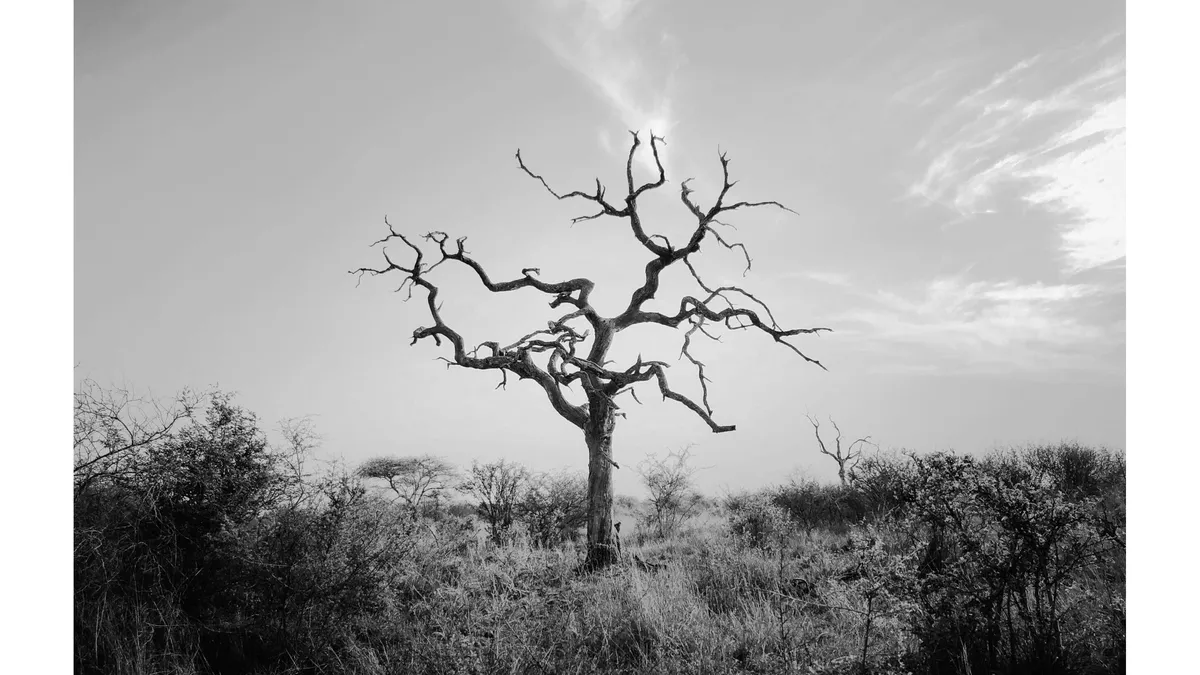
Mastering Black and White Photography: Camera Settings
To capture stunning monochrome images, use these tips for getting the best results when shooting black and white photos: By following these tips and experimenting with different camera settings, you can capture beautiful black and white photos that will stand the test of time.
Black and white photography is a timeless art form that strips away the distraction of color, leaving only texture, contrast, shape, and emotion. Mastering the nuances of monochrome requires a fundamental shift in how you view the world through your viewfinder. In this tutorial, we will explore the critical camera settings and foundational techniques necessary for capturing stunning black and white shots.
The most crucial element of black and white photography is learning to "see" in monochrome. Since you cannot rely on bold colors to make your subject stand out, you must rely entirely on contrast and light. Before you even touch your camera dial, look for strong geometric shapes, deep shadows, and bright highlights. A scene that looks visually flat and uninteresting in full color can often transform into a dramatic, moody masterpiece when rendered in black and white.
When configuring your camera, we highly recommend shooting in RAW format rather than JPEG. While many modern digital cameras feature excellent built-in monochrome JPEG profiles (which are great for visualizing the final result on your LCD screen), a RAW file retains all the original color data captured by the sensor. This provides you with infinitely more flexibility during the post-processing phase, allowing you to independently adjust the luminance of specific color channels (e.g., darkening a blue sky to make white clouds pop) using software like Adobe Lightroom or Capture One.
If your camera allows it, set your Picture Style or Film Simulation to Monochrome while shooting RAW. This trick allows you to preview the scene in black and white through your electronic viewfinder while still saving the full-color RAW data to your memory card.
For optimal exposure, pay close attention to your camera's histogram. In black and white photography, you often want a wide tonal range—meaning you want rich, deep blacks and crisp, bright whites, with plenty of mid-tones in between. Be careful not to completely "clip" your highlights (overexpose them to the point of pure, unrecoverable white) unless it is a deliberate artistic choice. Using a low ISO (such as ISO 100 or 200) is generally preferred to minimize digital noise and retain smooth tonal gradients, though introducing high ISO grain can sometimes add a gritty, vintage, and highly atmospheric aesthetic to street photography or documentary work.
Finally, do not underestimate the power of physical lens filters. In the days of film, photographers relied heavily on red, orange, and yellow glass filters to manipulate contrast before the light ever hit the negative. For instance, a red filter will dramatically darken a blue sky and increase the overall contrast of a landscape. While you can simulate these effects in post-processing, utilizing physical filters can help you achieve a cleaner, more deliberate exposure directly in-camera.
📦 Download the Designer Asset Pack
Enjoyed the resources in this article? Enter your email to unlock my private vault of free premium UI templates, custom vector assets, and typography configurations delivered straight to your inbox.
Continue Reading
5 Essential Tips for Improving Your Photography Skills
Are you a budding photographer looking to improve your skills and take your photography to the next level?
Bigbtc one of the best faucet
A crypto faucet is a platform that dispenses small amounts of cryptocurrency as a reward for completing tasks.
Faucetbtcclaim faucet
A crypto faucet is a platform that dispenses small amounts of cryptocurrency as a reward for completing tasks.